Powered by Blogger.
Showing posts with label Rice. Show all posts

Tuesday, March 13, 2012

Spanish Rice and Eggs with Tomate Frito


"Yuck."  Or at least that's what my husband says every time I say I'm going to make this dish.  But hold your horses...Spanish Rice and Eggs is a little out of the ordinary, but it's delicious, warming and filling!  It takes all of about 20-30 minutes to make, and you probably have all of the ingredients in your kitchen right now.  How can you beat that?!

I learned how to make this dish when I lived in Spain.  The grandmother of the family I lived with would make this about once a week for our lunch, and I totally looked forward to that day each week like a kid looks forward to dessert.  That's how much I love this!  And to tip the scales, my daughter loves it as well.  So we have a 2 to 1 vote in our household, and I'm not inclined to count my husband's since he hasn't even tried it.  His loss. ;-)

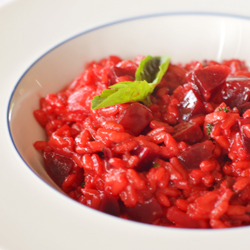
So really, this is just rice layered with what the Spanish call "tomate frito" (fried tomato sauce) and an over-easy to -medium egg.  Go try it and let me know what you think so we can settle this family feud once and for all! 
Spanish Rice and Eggs with Tomate Frito
Serves 2

2 cups water
1 cup rice
1 garlic clove, peeled
1 15-ounce can unsalted tomato sauce
1 tablespoon extra virgin olive oil
Salt
Pepper
2 eggs

Put the water in a small saucepan, cover, and bring to a boil.  Once boiling, add the rice and garlic clove, cover, and simmer on very low heat for about 20 minutes or until the rice is done.

While the rice is cooking, place the tomato sauce and olive oil in a shallow pan.  Add salt and pepper to taste and cover.  Simmer on a low heat until your rice is ready.

When the rice is done, heat a small pan and spray with cooking spray or coat with a small amount of olive oil.  Fry the eggs to your desired consistency.  (I like my whites cooked all the way through, but my yolk runny for this dish.  Once the yolk mixes with the rice and tomato sauce, it makes a delicious creamy sauce for the dish.) Top with freshly-ground pepper.

Eat immediately and sop up the sauce with crusty bread.

 Subscribe to free updates from The World in My Kitchen


Read more...

Monday, October 3, 2011

Butternut Squash Risotto


Butternut squash is one of those ingredients that I'm learning to love.  I've never liked squash in general (as I've mentioned a thousand times on this blog), but since I get them from my CSA, I have always felt an obligation to keep trying the different squashes so I don't waste what we're given.  Last year, I came up with a soup that my husband and I love and then I froze the rest to be used in quick breads in lieu of pumpkin. 

Last week we received our first butternut squash, and I struggled to suppress a groan.  I know, I know, I'm crazy, but I just haven't been feeling creative in the kitchen over the past couple of weeks.  The slump is due to my crazy busy life, I know, but just thinking about figuring out what to do with the squash was exhausting.  Then inspiration struck...I was going to make some risotto!  I have about ten different rices in my cupboard, and had just been thinking about how to get them into my repertoire more often when the butternut squash crisis happened.

And that's how a delicious recipe and side dish was born out of the ashes of my worn-down self.  Make it...you won't be disappointed!

Butternut Squash Risotto


Butternut squash "puree":
1 medium butternut squash, quartered into wedges and seeded
3-4 sage leaves, chopped
1/2 tsp Kosher salt
1/4 tsp pepper
Olive oil

Rice:
1 Tbl unsalted butter
1 Tbl olive oil
1/2 medium onion, diced
2 cups arborio rice
3 sage leaves, chopped finely
1/2 cup dry white wine
4 cups chicken stock
Butternut squash puree from one medium squash
4 Tbl grated parmesan cheese, plus extra for garnish
Salt and Pepper, to taste

To make the butternut squash "puree":
Preheat the oven to 400 degrees F.  Lay the butternut squash wedges in a rimmed baking sheet, skin side down.  Sprinkle the flesh with the sage, salt and pepper.  Drizzle a little olive oil over the squash, and using a pastry brush, brush the oil all over the flesh so that it's completely coated.  Place in the oven and bake for 30-50 minutes or until the flesh is soft.

When the squash is cooked, remove from the oven and allow to cool slightly.  Scoop out the flesh into a bowl and smash with the back of a fork until it is broken down.  There should be some chunks left.  Set aside.

To make the risotto:
Heat the chicken stock in a saucepan until just simmering.  In a larger pot, heat the butter and oil over medium heat until the butter is melted.  Add the onions and saute until the onions start to wilt, about 5-10 minutes.  Add the rice and sage and stir to coat with oil.  Saute, stirring often, for a couple of minutes, or until the rice starts to become translucent.  Add the wine, stirring constantly until the wine is almost completely absorbed.  Add 1/2 cup chicken stock and stir until it's almost completely absorbed.  Continue adding chicken stock, 1/2 cup at a time, until the stock is used up or until your rice is done.  (Risotto should be done "al dente," which means that there should be some chewiness to the rice.  It should not get mushy.)  If you use up all of the stock and the rice is not completely done, add a little hot water until it is done. 

Add the butternut squash "puree" and parmesan cheese to the rice.  Stir well and taste.  Add salt and pepper to taste.  Serve hot with a sprinkling of parmesan.

 Subscribe to free updates from The World in My Kitchen


Read more...

Monday, July 11, 2011

Beet Risotto: Kid and Adult Friendly!


If you were to ask my five-year-old daughter what her favorite vegetable is, she would respond with "Beets."  Beets for a five year old???  Yes, my daughter loves all of the "strange" vegetables that kids don't normally like: beets, asparagus, Brussels sprouts, okra.  You name a vegetable, she'll like it.  (Although strangely enough, she is middling on potatoes.)


So when we got beets a couple of weeks ago from our CSA, she did a happy dance.  She's happy to eat them roasted and plain or in a salad, but I wanted something a little different.  And then I stumbled across this recipe on Tastespotting.  The vibrant color mesmerized me, and when I was able to shake the stupor off, I realized that I had every ingredient I needed already in my kitchen!  It's an incredibly easy recipe, and my daughter oohed and aahed over the brilliant ruby color.  This is one way to get your kids to eat their veggies and enjoy them for yourself too!

I halved the recipe since it was only my daughter and I, and there wasn't a morsel left.  (The recipe below is the original amount.)  I also roasted the beets a couple of days before, which saved a ton of time when it came to making the risotto.

Red Beet Risotto
from bella eats


3/4 lbs beets (1 small bunch)
Olive oil

6-7 cups chicken stock
2 Tbl extra virgin olive oil
1/2 cup onion, finely chopped
1 1/2 cups arborio rice
2 garlic cloves, minced
1/2 cup white wine
Salt
Pepper
1/2 cup Parmesan cheese, grated
2 Tbl flat-leaf parsley, finely chopped

Roasting the beets:
Preheat the oven to 400 degrees F.  Place the beets in a small baking dish and lightly drizzle with olive oil.  Roll the beets around until they are completely coated in oil.  Cover tightly with foil.  Roast for about 20 minutes or until they are easily pierced with a fork.  Remove from the oven and cool completely.  Peel the beets--the skins should slide off easily.  Dice.

Making the risotto:
Place the chicken stock in a saucepan and bring to a simmer.  Reduce the heat to low.

In a large, heavy-bottomed pan, heat the 2 tablespoons of oil over medium heat.  Add the onions and stir occasionally until the onion soften, about 3 minutes.  Add the rice and garlic, stirring constantly until the rice is completely covered in oil and starts to crackle, about 3 minutes.

Add the wine and stir constantly until the wine has been almost completely absorbed.  Add a ladleful of stock and continue to stir until it has been almost completely absorbed.  Add another ladleful, and continue doing this for about 10 minutes.

Stir in the diced beets.  Add more stock, and continue as before for another 10-15 minutes or until the rice is finished.  The rice should not be mushy, but should also not be hard in the middle.  When the rice is finished, add the Parmesan cheese and parsley.  Season with salt and pepper.  The rice should be creamy--if not, add another ladleful of stock.

Serve hot.
 Subscribe to free updates from The World in My Kitchen


Read more...

Tuesday, February 8, 2011

Chicken in a Red Sweet Pepper Sauce: A Go-To Indian Dish


It snowed here again last night, so I thought that I'd post another Indian dish to ward off the cold. This Chicken in a Red Sweet Pepper Sauce is a delicious, not-so-spicy (although you can change this if you'd like) dish. The ingredient list is longer than previous Indian dishes I've posted, but the work is worth it. We often double the amount of sauce for this dish, cook it with the chicken, and then freeze the second half of the sauce. Then all we have to do is add some chicken and we have a quick meal at another time. I also highly recommend serving it with Spiced Basmati Rice and some raita--a cool yogurt and cucumber sauce that works wonderfully with the red pepper.

Chicken in a Red Sweet Pepper Sauce
from Madhur Jaffrey's Indian Cooking

2 1/4 pounds chicken parts (We like thighs and drumsticks.)
1 large onion, coarsely chopped
1 inch cube of ginger, peeled and coarsely chopped
3 cloves garlic, peeled
2 1/2 Tbl blanched, slivered almonds
3/4 lb. sweet red peppers, trimmed, seeded, and coarsely chopped
1 Tbl ground cumin seeds
2 tsp ground coriander seeds
1/2 tsp ground turmeric
1/8-1/2 tsp cayenne pepper (depending on your heat tolerance)
2 tsp salt
7 Tbl vegetable oil
1 cup water
2 Tbl lemon juice
1/2 tsp black pepper

If the chicken legs are whole, separate them from the thigh. Breasts should be cut into four parts. Skin all of the chicken pieces.

Combine onion, ginger, garlic, almonds, peppers, cumin, coriander, turmeric, cayenne and salt in a food processor or blender. Blend until you have a paste.

Put the oil in a large, wide, and preferably non-stick pan and heat it over a medium-high heat. When hot, pour in all of the paste from the food processor or blender. Stir and fry the paste for 10-12 minutes or until you can see the oil forming tiny bubbles around it.

Put the chicken along with the water, lemon juice and black pepper into the pan. Stir to mix and bring to a boil. Cover, turn heat to low and simmer gently for 25 minutes or until the chicken is tender. Stir a few times during the cooking period.

Serve with rice.

Subscribe to free updates from Mindy's Mouthful


Read more...

Friday, January 28, 2011

Spiced Indian Basmati Rice


I won't be writing a "The Week in Review" this week, as I haven't had time to review anything! My Google Reader is chock full of what I can only assume is great writing, photography and food, but I haven't had a chance to even peek at it all week! Instead, I'm going to write about Indian food again, like I promised last week. Better late than never, I always say. :-)

This is my family's go-to rice for Indian food. It has plenty of flavor on its own, and even my daughter, whose spice-o-meter is set to low, loves the deep flavor of the basmati rice, Indian spices and aromatics. Although it's easy to make, it does take some time, so plan ahead. It's also very forgiving--no worries if you're missing an ingredient...just forge ahead! Or if you happen to have some extra peas laying around, add them. We serve this with every Indian dish we make.

Spiced Basmati Rice
from Indian Cooking by Madhur Jaffrey

2 cups basmati rice
3 Tbl vegetable oil
1 small onion, finely chopped
1/2 fresh, hot green chili (such as a jalepeño), minced
1/2 tsp garlic, minced
1/2 tsp garam masala (You can make your own, but we get ours from Penzey's.)
1 tsp salt
2 2/3 cups chicken stock

Place the rice in a bowl. Wash it in several changes of water, until the water runs clear. Cover with plenty of fresh water and let it soak for 30 minutes. Drain in a sieve and let it sit for 20 more minutes.

Heat the oil in a heavy-bottomed saucepan with lid over medium heat. Add the onion and fry, stirring often, until the onion has browned lightly. Add the rice, chili, garlic, garam masala and salt. Stir gently for about 4 minutes. If the rice begins to stick to the bottom of the pan, turn down the heat slightly. Pour in the stock and bring to a boil. Cover with a tightly-fitted lid, turn the heat to very low and cook for 25 minutes.

Subscribe to free updates from Mindy's Mouthful


Read more...

Thursday, August 26, 2010

Gallo Pinto: Costa Rican Rice and Beans


My husband and I celebrated our honeymoon in Costa Rica almost seven years ago. I saw this as a minor moral victory because we take most of our vacations in German-speaking countries, which, although beautiful, isn't really known for its tropical feel or warm beaches. I am from California, and beaches are in my blood. So when we settled on Costa Rica for our honeymoon, I did a little dance inside.

One of the hotels we stayed at on the west coast served the national dish, Gallo Pinto, every morning for breakfast with a side of scrambled eggs and delicious tropical fruit. I bought a small cookbook just for the Gallo Pinto recipe and was not disappointed. I have made adjustments over the years and make this whenever I get the chance. It's inexpensive to make, but delicious and filling. One note: it would seem that it wouldn't matter about how old the rice is, but "day-old rice" really does taste better in this dish than fresh rice.

Gallo Pinto

3 slices of bacon, cut into matchsticks
1 Tbl olive oil
1/4 cup finely chopped bell pepper
1/4 cup finely chopped onion
1 can black beans (or ~2 cups freshly cooked black beans)
2-3 cups day-old rice
1 Tbl Worcestershire sauce, plus more to taste
1 Tbl hot sauce
2 Tbl chopped cilantro
salt
pepper

Fry the bacon in a large pan until crispy. Remove the bacon and set aside.

Add enough olive oil to the bacon grease to make about two tablespoons of oil. Sauté the green pepper and onion until the onion starts to soften. Add the can of black beans, including the liquid, and cook for 2-3 minutes. Add the rice, Worcestershire sauce and hot sauce and cook, stirring occasionally, for 3-5 minutes, until the mixture comes together and is warmed through. Add cilantro and bacon. Salt and pepper to taste.

Serve warm alone or with scrambled eggs.


Subscribe to free updates from Mindy's Mouthful

Read more...

Wednesday, March 10, 2010

Valentine's Day Sushi

I know we're almost to St. Patrick's day, but with the way this year has been going, we might as well still be in February! So, I will post about Valentine's Day today, and maybe around Easter, I'll post about St. Patrick's Day, and so on...


Valentine's Day has never meant going out for a special meal for my husband and me, but we do celebrate by staying in. Our second date was on Valentine's Day, and it also happened to be the first time my husband cooked for me. We discovered that night that we both have a passion for cooking...and the rest is history!

After that first year, we decided that we'd make it a tradition to choose something out of the ordinary to cook for Valentine's dinner. A couple of years ago, we decided to make sushi, which was successful (and out of the ordinary for a couple living in a small southern town). This year, we decided to include our daughter in the Valentine's festivities and returned to the idea of sushi since it would be easy to prepare for and let her be involved.

As you can tell, she took her duties seriously:

She made one sushi roll and was done, but enjoyed the process. I would highly recommend this as an easy way to cook with your kids--you can easily prepare all of the "fixings" beforehand and then let your kids stuff away!

The most important part of sushi (in my mind) is the rice. It's not hard to make, but I've found that this method below works great and makes perfect sticky sushi rice. I found the information online years ago, but can't figure out where it came from, though.
Sushi Rice (Makes 6 large rolls)
500 ml (2 1/8 cups) Sushi Rice (We use Tamaki Gold.)
600 ml (2 1/2 cups) water
60 ml (4 Tbl) rice vinegar (We use Marukan.)
30 ml (2 Tbl) sugar
5 ml (1 tsp) salt

Tezu (Vinegar-Water Solution)
250 ml (1 cup and a smidgen) water
30 ml (2 Tbl) rice vinegar
5 ml (1 tsp) salt

Wash the rice under water until water is fairly clear while draining. Let the washed rice strain for 30 minutes.

While the rice is draining, prepare your Tezu. Mix all Tezu ingredients together and set aside.

Once the rice has drained, transfer it to a pot or a Japanese electric rice cooker and add the water. (We used the stovetop method.) Heat the water to boiling, cover tightly and simmer on very low heat for 18 minutes. Do not uncover! Remove the pot from the heat and let stand, covered, for 15 minutes.

While the rice is cooking, prepare the sushi vinegar. Mix 60 ml vinegar, 30 ml sugar, and 5 ml salt in a small saucepan. Heat until the sugar dissolves, stirring frequently. Remove from the heat and let cool to room temperature.

When the rice is finished, cut and fold the rice gently with a wooden spoon. Do not smash the cooked grains.

Moisten a large bowl (I used a wide, flat bowl to help the rice cool evenly) with the Tezu mixture. Place the hot rice into the mixing bowl and add 1/4 of the cooled sushi vinegar solution. Mix gently with a folding motion. Repeat until all of the sushi vinegar solution is gone.

After mixing, fan the hot rice mixture for 5 or 6 minutes to remove excess moisture and to create a glossy finish to the rice. (You can use an electric fan here.) The rice should be slightly chewy and sticky to the touch.


After making the rice, it's all downhill. Slice up some veggies--we like carrots, cucumber and avocado. Pick up some fish--it's up to you about how adventurous you are. I don't like fish, so I stick to veggie rolls, but my husband and daughter added some smoked salmon to theirs. Place the nori (the sushi wrapper) on the sushi roller, spread rice over most of the surface, leaving a little space at one end so that you can attach the nori to itself once wrapped. (If the rice is too sticky, use water on your hands and fingers to help spread the rice.) Add your fillings and roll! Make sure to roll as tightly as possible to keep all of those yummy fillings in. Once it's rolled, moisten the nori with some water and attach.

If you haven't rolled it tightly enough, you can always wrap each roll individually with some plastic wrap and refrigerate for a couple of hours. This should help keep the fillings in. Otherwise, place your rolls on a plate, cover with plastic wrap and refrigerate until cold. Once they are cold, slice into rounds with a sharp knife. Et voila! Serve with wasabi and soy sauce and enjoy!

Read more...

Sunday, September 6, 2009

Adventures in Okra: West African Stew


Lately, my CSA has been handing out okra like candy. I've had fried okra before since I lived in North Carolina during grad school, but had never tried to cook it myself. I'm not much of a fryer, so I went online to find something else to do with it, and came across a recipe for West African stew on Epicurious. I love peanut butter in savory dishes, so I thought this would be a winner.

I wasn't disappointed. This was a relatively easy dish, and although I'll be making some changes next time (reflected in the recipe below), there will be a next time. The okra was a little tough, but I think that could be remedied by letting it cook longer. And since okra isn't readily available everywhere or even during all seasons, my husband and I agreed that green beans would be a good substitute.

West African Stew
Adapted from Epicurious

6 boneless, skinless chicken breasts
1 tsp salt
1 14-oz can whole tomatoes in juice
1/4 cup water
2 Tbl tomato paste
1/4 cup peanut oil
1 medium onion, chopped
4 cloves garlic, minced and mashed with 1 tsp salt
3/4 tsp cayenne pepper (You can go up to 1 1/4 tsp, but we found that 3/4 tsp gave it a nice kick without overpowering the other flavors.)
1/2 cup smooth peanut butter, room temperature
1 3/4 cups chicken broth
Soy Sauce, to taste
1 lb. squash (or sweet potato)
10 oz okra, fresh or frozen, thawed if frozen
Chopped cilantro, for garnish
Brown rice

Arrange the chicken on several plates or a tray and sprinkle with 1 tsp salt. Let sit at room temperature for 30 minutes.

While waiting for the chicken, pulse the tomatoes in their juices in a processor or blender until finely chopped. Stir the 1/4 cup of water with the tomato paste in a small bowl until smooth. Whisk together the peanut butter and 1 cup of broth in another bowl until smooth.

Heat the oil in a 6-7-quart heavy-bottomed pot and brown the chicken over a moderately hot flame in batches, a few minutes on each side. Remove the chicken and drain all but 2 tablespoons of oil. Lower the flame to a moderate heat and add the onions to the pot, and cook, stirring occasionally until the onions are golden around the edges, about 2-3 minutes. **At this point you can either leave the chicken breasts whole or cut into several slivers. If serving in a bowl, I suggest the slivers.**

Add the tomato mixture, tomato paste, garlic and cayenne to the onions and mix well. Then add the peanut butter mixture, the remaining 3/4 cup broth, and a couple of splashes of soy sauce and mix. Add the chicken into the sauce. (The chicken may not be covered completely.) Bring to a boil, uncovered, and then reduce the heat and cover. Cook for 25-30 minutes or until the chicken is very tender.

**Start cooking your rice now.**

Peel your squash and cut into chunks. Add the squash and okra in the last 10 minutes of cooking and let simmer 10-15 minutes, until the squash is tender, but not falling apart. Remove the okra and cut into thick slices and return to the stew.

Serve over brown rice.


Subscribe to free updates from Mindy's Mouthful

Read more...

Friday, July 31, 2009

Arroz al Horno in The FoodieView Weekly Meal Plan!


My recipe for Arroz al Horno has been featured in The FoodieView Weekly Meal Plan! Thanks to Paula at Bell'Alimento for including me!

Subscribe to free updates from Mindy's Mouthful

Read more...

Wednesday, April 22, 2009

Roasted Tomato and Brown Rice Stuffed Peppers

Last week, I roasted a huge batch of tomatoes--normal ones for Pasta alla Puttanesca and cherry tomatoes to try out The Second Lunch's Roasted Tomato and Brown Rice Stuffed Peppers. I often find time-consuming recipes that I'd love to try, but having a two year old under my feet prevents me from spending hours in the kitchen, so I've come up with some time-saving techniques to have my cake and eat it too. (This begs the question...do mothers get to eat their cake too??? I'm not so sure about that one yet!) One of those techniques is setting aside some time (perhaps naptime?) to prep ingredients for meals later in the week.


This week, my meal list had two recipes that called for roasted tomatoes. (What can I say? I'm wishing summer into existence!) So, I roasted them all at once, let them cool, and then put them in tupperware in the fridge until I was ready to use them. Looking back, I should have used that time to pre-cook the rice as well...


All of this was in preparation to make these beautiful stuffed peppers:


I grew up eating stuffed bell peppers, which was one of my favorite dishes my mom made, but I was looking for something a little lighter than what my mom made--basically meatloaf with rice in the pepper--and came across this little gem. It uses brown rice, which I've decided to try to put in my diet whenever possible, and packs quite a flavorful punch! I didn't serve this with the yogurt as suggested, but my husband and I both agreed that it would add a nice richness to the dish. The original recipe called for ground turkey, but our family just isn't into ground poultry, so I went the ground beef route. It could also be made into a vegetarian dish very easily. Either way, it's worth a try!


Roasted Tomato and Brown Rice Stuffed Peppers
adapted ever-so-slightly from The Second Lunch

2 cups cooked brown rice
1 lb. cooked ground beef (seasoned well with cumin, salt, pepper, chile powder)
1 onion
olive oil
2 cups cherry tomatoes
2 cloves of garlic
a few tablespoons of freshly torn basil
salt and pepper
4 red bell peppers
A good glug of balsamic vinegar
1 tsp each of dried thyme and oregano
Small handful of fresh parsley
olive oil
plain yogurt (optional)

1. While brown rice is cooking, pop a few handfuls of cherry tomatoes in a pan with some olive oil, garlic cloves, salt, pepper, and freshly torn basil. Cook at about 300 degrees F, until the rice is done, about 40 minutes. (This can be done ahead of time and stored in the refrigerator.)

2. If cooking all at once, right after popping the tomatoes in the oven, start the ground turkey, first sauteeing an onion in a little bit of olive oil for about 10 minutes until soft, and then adding the ground beef, and cooking until well browned. Season with salt, pepper, cumin, and chili powder to taste.

3. When the rice, tomatoes, and ground beef are done, stir together in a bowl, and add a good glug of balsamic vinegar, and the thyme and oregano.

Assembling the peppers:

4. Preheat the oven to 400 degrees Fahrenheit. Line a deep baking tray or roasting tray with foil, and grease lightly.

5. Cut the peppers lengthwise, leaving the stem in place, but scooping out any seeds and excess white bits. For smaller peppers, feel free to lop off the top instead of cutting lengthwise. Place the peppers in the baking tray, season with a little salt, and pour on a little bit of olive oil.

6. Stuff the peppers with the mixture, place in the pan, and cover with foil, cook for 45 minutes at 400 F, uncover and cook for about 10 more minutes, or until top has lightly browned.

Read more...

Monday, April 6, 2009

A Last Salute to Winter: Moroccan Minestrone

A couple of weeks ago, I saw this recipe for Moroccan Minestrone on Joie de Vivre's blog, and thought that since winter hadn't quite left yet (last week), that it would be the perfect send off for the winter blues...


I finally got my husband to agree to some brown rice to go along with this (per Joie de Vivre's suggestion), and it was the perfect accompaniment. (It's strange that my husband has held out on brown rice this long since he's the one who convinced me to switch to whole wheat bread a few years ago. It turns out that he's never had properly cooked brown rice...) I made a couple of very minor changes, but I basically used Joie de Vivre's recipe. I love cilantro, so I garnished it with some fresh chopped leaves, which really brightened the flavors.

The overall family consensus? They loved it! It's easy to make, and since my daughter loves chickpeas, rice and beans, this disappeared faster than winter these days...

Moroccan Minestrone
adapted from Whole Foods by Jude Blereau by Joie de Vivre
and then further adapted by me!

Ingredients

1 c. dried chickpeas, soaked overnight (There seems to be no reason you couldn't used canned chickpeas here and cut out a step...)
olive oil
1 onion, diced
3 celery stalks, finely sliced
2 inch piece of ginger, finely chopped
1/2 tsp. ground cinnamon
1 tsp. turmeric
1 Tbls. chopped fresh cilantro leaves + more for garnish
1 c. dried Puy lentils
14 oz. can of chopped tomatoes
3 Tbls. tomato paste
2 quarts chicken stock
Juice from 1/2 lemon
Cooked brown rice, to serve

Directions:

1. If using uncooked chickpeas, place the chickpeas in a pot with enough water to cover and soak overnight. Rinse, add more water to cover and bring the water to a boil and then lower heat to a simmer and partially cover. Check the beans periodically to make sure they are still covered with water and cook until soft 1-2 hours. You will end up with about 3 c. of cooked chickpeas, so if using canned, use the equivelant.
2. Heat a large soup pot over medium-high heat and add the olive oil. Saute the onions and the celery in the olive oil until they are softened and starting to brown. Add the ginger, cinnamon, turmeric and the cilantro and cook, while stirring, for another minute.
3. Add the lentils, chickpeas, tomatoes, tomato paste and stock. Cook over medium heat for 45-60 minutes until the lentils are soft. Adjust the seasonings. Add the lemon juice.
4. If desired, serve over cooked brown rice.

Read more...

Tuesday, March 31, 2009

Leftover Rice Salad

It looks like spring has finally sprung here in Strasbourg! This little branch was trying to sneak in my dining room window today...

In celebration of the coming of spring, most of my groceries this week were fruits and veggies, and I was inspired to make a salad with leftovers from the last couple nights' dinners and some of those veggies I bought today. I have to confess that I tend to let food go to waste more than I'd like. I always save that little bit of leftover rice, pasta, half of tomato, etc., but then forget about it. I'm working at trying to be more creative in how I use those leftovers up, and between that and the promise of spring, I thought that a salad would be the perfect vehicle for the leftovers in my fridge--namely a little brown rice (from Joie de Vivre's Moroccan Minestrone--a later post), a half of a rosemary balsamic chicken breast, and a small handful of arugula.

The result was a very yummy and filling cold rice salad to which I added a handful of cherry tomatoes, chopped red bell peppers, and a simple homemade honey mustard dressing (equal parts Dijon mustard, honey and red wine vinegar with a pinch of salt and pepper mixed with olive oil to taste). I think that maybe next time I'd add some sliced green onions (if I have any on hand), but I'm definitely making this again. It would be especially good as a lunch to pack for work once I return in the summer...

Read more...

Wednesday, November 12, 2008

Arroz al Horno...a Warming Spanish Rice Dish


Right after college, I spent a year in Spain as an au pair. I didn't have much to do while the kids were in school, so I often observed the ritual that was cooking lunch. One of my all-time favorites was Arroz al Horno (literally, Oven Rice). Traditionally, it's prepared in an eartherware casserole called a cazuela, and it is one of my prized kitchen possessions at home. However, in France, I don't have one, so I've used a heavy oven-proof pot. It's worked out well, but it doesn't create the nice crust that the clay dish does and just doesn't look as impressive on the table. It still looks nice, but if you make this, try to use the prettiest oven-proof casserole or pot you have... **Update 7/17/09: I've updated the photos to show this dish in the cazuela.

Something else that always draws me to this recipe is that it's cheap. All it takes is a little rice, potato, tomato, garlic, and chickpeas. All easy to find and very inexpensive to make. I like to pair this with a nice, cold bowl of gazpacho and croutons to begin the meal and often serve a strong red Rioja.

I've taken some of the measurements from Penelope Casas' recipe in The Foods and Wines of Spain, but the preparation is how I learned to do it while living in Spain. Technically, this is usually served with morcilla, a Spanish blood sausage, but this can be difficult to find in the States, and it usually turns diners off, so I only use it if I'm making it for myself. I've also added chicken to the recipe, which is not typical in Spain, because my husband, as I've mentioned before, likes a little meat with his meals. I prefer it without chicken, so the recipe below is chicken-free. If you'd like to add chicken, feel free to cut a breast or two into slivers and add them during the boiling stage. And finally, it's easy enough to make this completely vegetarian by using veggie stock instead of chicken stock.

Arroz al Horno

1 can of chickpeas, liquid reserved
¼ cup olive oil
½-1 medium onion, chopped
½ large tomato, skinned and finely chopped, other half sliced
1 clove garlic, minced
½ medium to large potato, peeled, in 1/8-inch slices
¼ tsp paprika
1 cup short-grain rice
Pinch Saffron
Salt
1 head garlic, unpeeled, in one piece
2 oz. morcilla in ¼ inch slices (optional)


Preheat the oven to 325 degrees F. Drain the chickpeas and reserve the liquid. Add enough chicken broth to make 2 cups.

Heat the oil over a med-high flame in an oven/stovetop-safe casserole/pot and saute the onion until wilted. Add the tomato and cook 3 minutes, stirring often so the tomato doesn't stick.

Add the garlic, the potato slices and paprika and cook a couple minutes more. Stir in the rice and cook, stirring frequently, 5 minutes more. Add the chickpeas and broth, season with saffron and salt.

Bring to a boil and cook over a med-high flame, uncovered and stirring occasionally, for 5 minutes, or until the rice is no longer soupy but some liquid remains. Place the dead of garlic in the center of the casserole and the slices of tomato around dish.


Arrange the morcilla slices on top (if using) and place in the oven for 20 minutes. Remove and cover lightly with foil. Let rest 5-10 minutes before serving.


**As tempted as you'll be to eat the "roasted garlic," don't. It is rather tasteless, as the rice soaks up the flavor.


Subscribe to free updates from Mindy's Mouthful

Read more...
LinkWithin Related Stories Widget for Blogs

  © Blogger templates The Professional Template by Ourblogtemplates.com 2008

Back to TOP  

Google Analytics Alternative